
Pair a Kiosk
The kiosk is a tablet at your venue entrance. Customers use it to join the queue. Pairing connects the tablet to your location and queue in Jonot.
Jonot provides an Android kiosk app for wall-mounted tablets and a desktop kiosk client for macOS, Windows, and Linux. Both show the same kiosk screen. They also provide features that a browser cannot: full-screen mode that blocks shortcuts, a PIN-protected exit, local ESC/POS ticket printing, and automatic switching to a host at your venue during an internet outage. See the desktop lockdown guide for details about full-screen mode and the PIN-protected exit. See Install Jonot for download links. Pairing works the same way in every one of them.
Pairing steps
Section titled “Pairing steps”Pairing uses two devices. A code appears on the kiosk screen. You enter the code in Admin to activate the kiosk.
Step 1 — find the code on the kiosk device
Section titled “Step 1 — find the code on the kiosk device”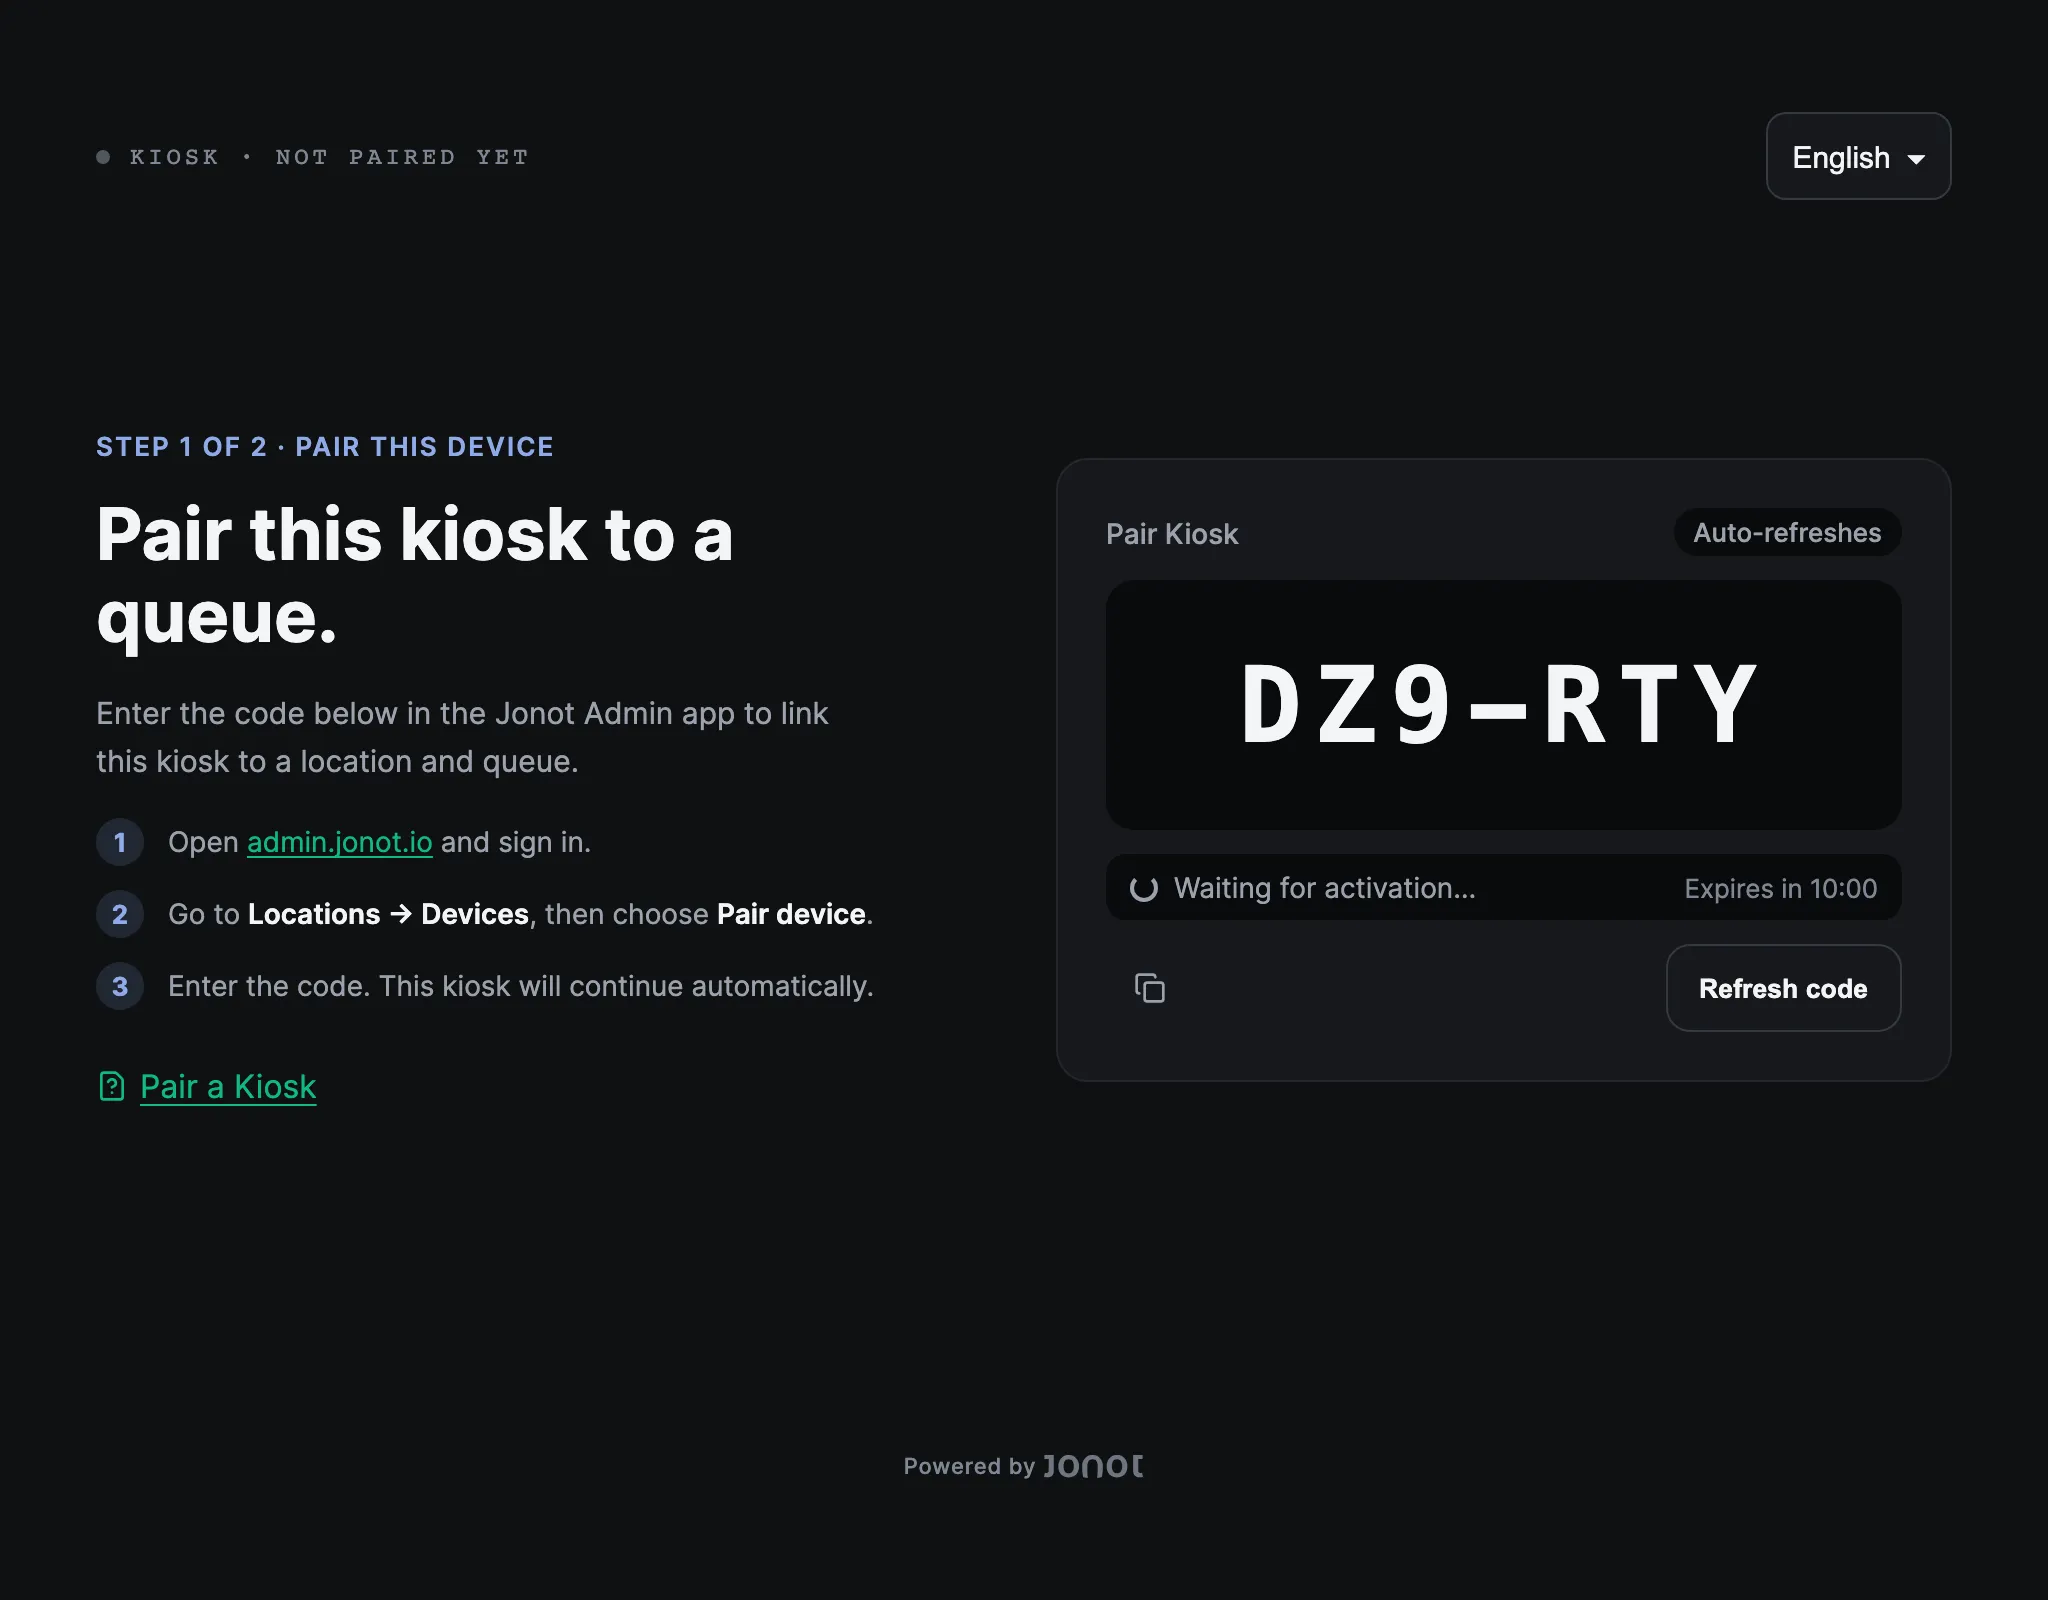
Recommended: dedicated kiosk app
Section titled “Recommended: dedicated kiosk app”- On the tablet that will live at your entrance, install and open the Jonot Kiosk app — get it on Google Play (recommended), or download the APK directly for on-site deployments or deployments managed with mobile device management (MDM) when Google Play is not available. On a desktop or laptop, install the desktop kiosk client instead.
- Open Pair this device → if the pairing screen is not shown automatically.
- A 7-character pairing code, such as
K7M-4PQ, appears on the screen. The code is valid for 10 minutes.
Alternative: browser-based kiosk
Section titled “Alternative: browser-based kiosk”If you are testing Jonot in a browser or do not use a native app, open https://kiosk.jonot.io/pair/ on the kiosk tablet. The same 7-character pairing code appears. Activate it in the same way.
Keep the tablet visible. You will type this code into admin in the next step.
Step 2 — activate the device in admin
Section titled “Step 2 — activate the device in admin”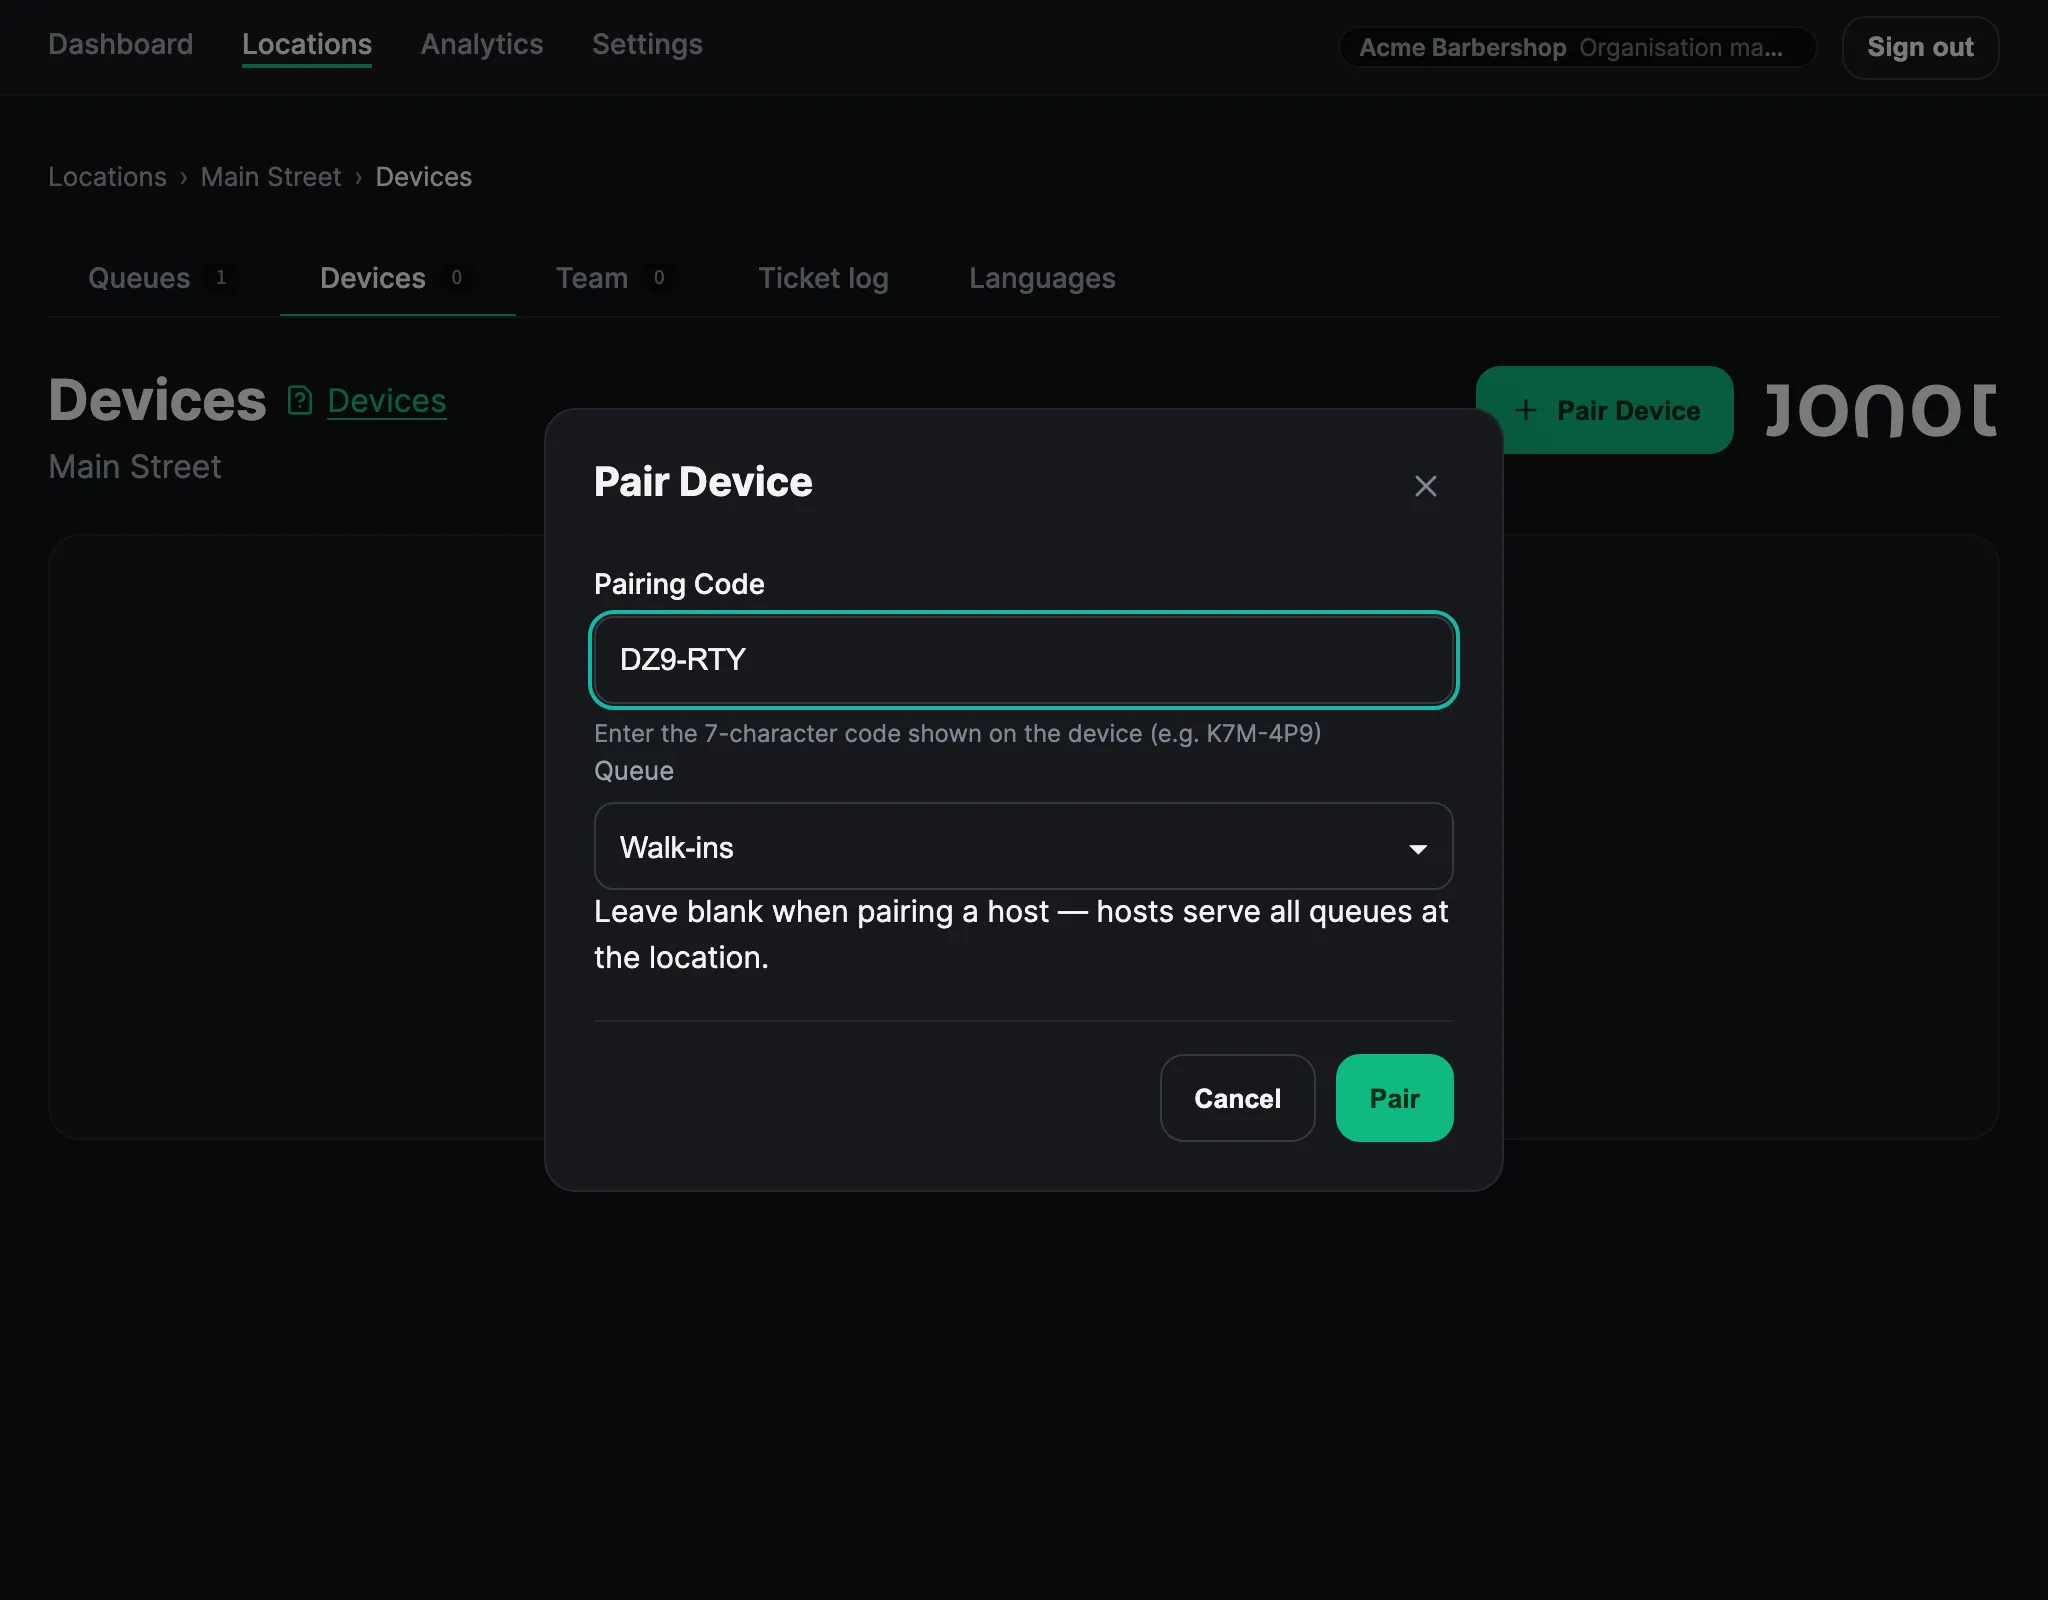
- In admin, open your location and go to the Devices tab.
- Click Pair device. The code identifies the device as a kiosk, so you do not need to select a device type.
- Choose the queue this kiosk will serve.
- Enter the 7-character code shown on the tablet screen.
- Click Pair. The kiosk detects activation and opens the queue view.
If the code expires before you enter it in admin, return to the kiosk pairing screen and request a new one.
If you use the Android app or desktop kiosk client without a configured printer, the printer setup screen opens before the queue screen. You can also open printer setup later from the kiosk settings menu. See Customise the Kiosk for details.
After pairing
Section titled “After pairing”The kiosk appears in the Devices list with status Online. If an Android or desktop kiosk does not have a configured printer, printer setup can open immediately after activation. After setup, customers can use the kiosk to join the queue.